Have you ever had the experience of going to a site and patiently waiting forever for it to load?
Probably not, because no one waits forever for a site to load. We just close the browser tab and move on.
Time matters.
When it comes to getting the user’s attention, we only have a very brief window of opportunity. According to Ilya Grigorik, on his “Speed, Performance, and Human Perception” keynote, you only have one second.
One second!
After that first second, a mental context switch occurs. In the user’s mind, it has been so long that they start to think about other things.
And after about 10 seconds, the user is already bored and will probably close their browser tab and get on with their day.
What I will cover in this guide is a process for optimizing your website’s performance. I’m going to use my own site as an example.
If you haven’t done the things discussed in this guide, you will get guaranteed website speed improvements after performing the steps that I will be discussing.
Initial Benchmarking
The first thing to do is to test the current performance of the site. This will help us see issues related to web performance, as well as help us prioritize our efforts.
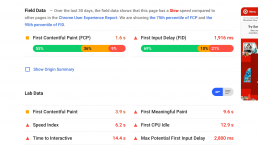
One excellent tool for benchmarking front-end performance is Google’s performance analysis tool, PageSpeed Insights. It will check your site and give you a score based against a set of performance guidelines and best practices.
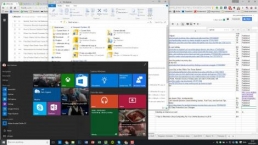
Here’s the first result I got for mobile:

And for desktop:

Google Developers has another useful test available, called Mobile-Friendly Test. This tool will show you potential areas for improvements. For this test, everything’s OK on my site:

Improving Performance
There are two general approaches to improving website performance with the use of developer tools.
- You can use online tools
- You can use open source web development tools on your machine
The first approach is straightforward: Grab all your files and use the online tools to do whatever it needs to do (lint, minify, concatenate, etc.).
Done. Well… not quite.
What if you have 50 files to minify? Or 200? And what if you change your code? Are you going to repeat that task over and over?
That’s why I’ll cover the second approach, because it’s more flexible and scalable. However, it’s a more complicated approach, especially at the start.
We’ll use Gulp, a JavaScript task runner (similar to Grunt), that will do all the work for us. (If you don’t know what developer tools like Gulp, Grunt, Bower, and Yeoman are, check my blog post where I give a brief intro about them.)
To improve website speed and performance, this is what we will do:
- Set up Gulp
- Minify the CSS and JavaScript files
- Concatenate the CSS files and JavaScript files
- Lint our JavaScript code to check for errors and issues
- Optimize the images
- Minify the HTML documents
Setting Up Gulp
The first thing to do is to set up a project working environment. All I did was grab all the files from my site and move them to a folder called src in my computer.

By the way, you will need Node (and npm) installed to be able to use Gulp in the manner I’ll be describing. See How to Install Node.js.
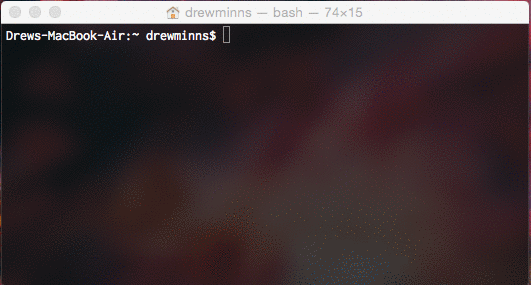
First, we need to install Gulp globally so that it’s accessible anywhere in our computer. Just open your terminal/command prompt and type:
npm install --global gulp
Then go to your project folder and install it in your development dependencies.
npm install --save-dev gulp
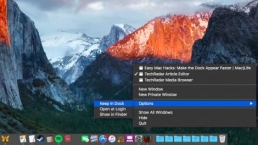
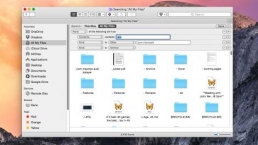
After that, you’ll see a new folder that will automatically be created for you called node_modules. That’s where Gulp and all your other Node modules for the project will be stored.
![]()
There’s just one more step to perform before running Gulp: We need to set up a configuration file so that Gulp knows what tasks to perform on our files. And that’s as easy as creating a file called gulpfile.js in your root folder with any text editor or source code editor.
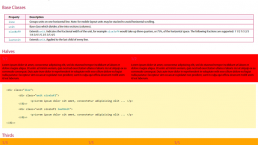
Here’s the initial contents of gulpfile.js:
var gulp = require('gulp');
gulp.task('default', function () {});
Right now it isn’t doing anything, but you can still run it. Just type:
gulp
and you should get an output like this:
[14:12:14] Starting 'default'...
[14:12:14] Finished 'default' after 72 μs
Now that we have Gulp ready to go, the next step is to create the Gulp tasks to do all the work for us.
Minifying CSS and JS Files
OK, let’s get some stuff done with Gulp! First task: Minifying our CSS and JS files.
The minification process, what it does basically does, is it strips off all white spaces, tabs, carriage returns, newlines, comments, and other unnecessary characters from our files. For JavaScript, it will also change object names to shorter ones.
Minification is performed in order to get a very small file size, while still preserving all our style rules and JS functionality.
In order to minify our files, we’ll need to install node modules that will help us with the task.
Let’s install the gulp-minify-css package, which will minify our CSS files. Then we will use the gulp-uglify package for our JavaScript files.
npm install --save-dev gulp-minify-css
npm install --save-dev gulp-uglify
Now that we have our required modules, we have to create the task for each one. We can actually do everything inside our default task, but I prefer to do a separate task for each type of file. This way, we’ll keep our code cleaner, easier to read and maintain, and, if we want, we can run the task for the CSS or the JS files separately.
Let’s add our minify-css and gulp-uglify modules to the top of our gulpfile.js.
var minifycss = require('gulp-minify-css');
var uglify = require('gulp-uglify');
Let’s create a couple of tasks. This is what they’ll do:
- Read all the .css and .js files
- Minify the files’ source code
- Export the output to another folder called
dist
// CSS minification task
gulp.task('css', function() {
  return gulp.src('src/css/*.css')
    .pipe(minifycss())
    .pipe(gulp.dest('dist/css'));
});

// JS minification task
gulp.task('js', function() {
  return gulp.src('src/js/*.js')
    .pipe(uglify())
    .pipe(gulp.dest('dist/js'));
});
All the processed files will go inside the dist folder after the tasks have been performed.
Issuing the gulp command again in your terminal/command prompt will create the dist folder, with the css and js folders inside that will contain our minified files.
Concatenating CSS and JS Files
Sending down the wire just a couple of files instead a bunch of them makes the whole process of loading a page much faster.
So what we’re going to do next is merge all our CSS files into one .css file, and all our JS files into one .js file. And for that, we’ll use the modules gulp-concat-css and gulp-concat.
$ npm install --save-dev gulp-concat-css
$ npm install --save-dev gulp-concat
We’re using different modules because gulp-concat-css is more appropriate for CSS files since it does the rebase of the URLs automatically.
Gulp is a stream-based build system, so if you want to apply another process after that, you just keep piping. Both modules require a string argument with the name of the concatenated file. In this case, I’m using semeano.min.css and semeano.min.js. (Actually, I’m not using any JS on my site, but I’ll do it just for the sake of the tutorial.)
First, let’s add our dependencies on top:
var concatcss = require('gulp-concat-css');
var concat = require('gulp-concat');
Then the additional piping for the tasks:
// CSS concatenation + minification task
gulp.task('css', function() {
  return gulp.src('src/css/*.css')
    .pipe(concatcss('semeano.min.css'))
    .pipe(minifycss())
    .pipe(gulp.dest('dist/css'));
});

// JS concatenation + minification task
gulp.task('js', function() {
  return gulp.src('src/js/*.js')
    .pipe(uglify())
    .pipe(concat('semeano.min.js'))
    .pipe(gulp.dest('dist/js'));
});
Linting JS Files
Linting won’t actually help reduce the size of the files, but it will help you detect errors and potential problems in our JavaScript code. And if we were to stretch it, JavaScript errors can lead to broken or low-performing functionality and, subsequently, a bad user experience. So linting your code is a must, in my opinion.
JSHint is a fork from another similar tool called JSLint. So why use JSHint? Basically, it all comes down to what you prefer. (If you want to know the reason behind the JSHint fork, read this article.)
Let’s install JSHint:
npm install --save-dev gulp-jshint
Add the dependency:
var jshint = require('gulp-jshint');
We need to pipe the code linting process before uglifying our source code, or else it will be tough to debug if JSHint spots an error:
// JS linting + minification + concatenation task
gulp.task('js', function() {
  return gulp.src('src/js/*.js')
    .pipe(jshint())
    .pipe(jshint.reporter("default"))
    .pipe(uglify())
    .pipe(concat('semeano.min.js'))
    .pipe(gulp.dest('dist/js'));
});
The reporter method is what will output the warnings on the terminal/command prompt. We’re using the default reporter, but you can change it to a different one.
Optimizing Images
When we run PageSpeed Insights, it will check if the images that we’re using are larger than they need to be. We can strip all the metadata from the images, which will reduce the file size a small bit. To optimize images, we’ll be using gulp-imagemin for raster images (e.g. JPG, PNG, and GIF) and gulp-svgmin for SVG files respectively.
$ npm install --save-dev gulp-imagemin
$ npm install --save-dev gulp-svgmin
Here are the tasks for minimizing images and SVG files. I think it’s pretty self-explanatory by now:
var imagemin = require('gulp-imagemin'),
    svgmin = require('gulp-svgmin');

...

// Image optimization task
gulp.task('img', function () {
  return gulp.src('src/img/*.*')
    .pipe(imagemin())
    .pipe(gulp.dest('dist/img'));
});

// SVG optimization task
gulp.task('svg', function () {
  return gulp.src('src/svg/*.svg')
    .pipe(svgmin())
    .pipe(gulp.dest('dist/svg'));
});
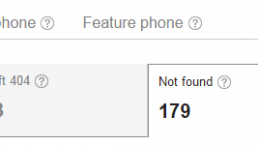
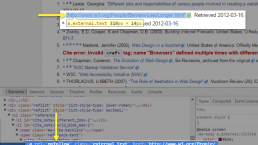
In my case, this didn’t actually make a big difference on the image, it just saved 543 bytes:
gulp-imagemin: Minified 1 image (saved 543 B - 0.2%)
But I remembered that the image was the main issue on the tests:

That is happening because I’m using the same image for desktop and mobile. Everything was fine on the desktop tests, but on mobile, since I’m using the original image and resizing it, I’m wasting a lot of pixels. The solution for this is to have different image sizes for each media-query breakpoint. That way, if you need a 200x200px image, the browser will download only that size, saving bandwidth along the wire.
Minifying HTML
Minifying our HTML files is also important, and here is where you’ll probably see the most savings in file size. To minify our HTML documents, we’ll use the gulp-minify-html. Also, in order to make the changes on the resources automatically, from the files in the src folder to the dist folder, we need to install gulp-useref.
npm install --save-dev gulp-minify-html
$ npm install --save-dev gulp-useref
Here’s the task:
var minifyhtml = require('gulp-minify-html'),
    useref = require('gulp-useref');
...
// Switch URIs to dist files + minify HTML task
gulp.task('html', function () {
  return gulp.src('src/*.html')
    .pipe(useref())
    .pipe(minifyhtml())
    .pipe(gulp.dest('dist'));
});
This task requires a small change in the HTML files (in this case there’s only one, the index.html). We need to add a special comment for the gulp-useref module referencing a block on resource files (html5reset-1.6.1.css and semeano.css) that will result in a single file (semeano.min.css) after the concatenation and minification.
<!-- build:css css/semeano.min.css -->
<link rel="stylesheet" type="text/css" href="css/html5reset-1.6.1.css" />
<link rel="stylesheet" type="text/css" href="css/semeano.css" />
<!-- endbuild -->
This way, the index.html in the dist folder will have just one link tag:
<link rel="stylesheet" type="text/css" href="css/semeano.min.css" />
Note: Now that we have all these tasks declared we need to call them. Just add the created tasks to the default task dependencies, i.e. an array of task names as the second argument:
// Default task
gulp.task('default', ['css', 'js', 'img', 'svg', 'html'], function () {});
What that basically means is that before running the default task, Gulp needs to run all those tasks first.
Conclusion
After these changes, we can see some improvement on the score. It seems like a small change (only 12%) but after the minification of our files we are sending 33% fewer KBs compared to before. That’s something! And it didn’t take a whole lot of time to achieve.

Here are some other things that could help improve the loading speed of your web pages:
- Use of spritesheets. Instead of downloading a set of images, just put them all together inside one single image file and use CSS to specify the area of each image. This solution also applies to SVGs.
- Convert images to WebP. WebP is a new image format that provides lossless and lossy compression for images on the web. WebP lossless images are 26% smaller in size compared to PNGs. But WebP browser support is low compared to PNG, GIF and JPEG.
- Inline CSS. If your CSS files are small, just inline them in your HTML using the
<style>tag. That will save you some server requests and will help avoid page-render-blocking CSS. This is a practice Google PageSpeed Insights recommends.
In future guides, I’ll share more intermediate-to-advanced website performance optimization tips and strategies, such as making changes to the structure of our HTML markup, other solutions for optimizing content delivery, and even some server configurations that will give us that final speed boost!
Feel free to share this guide on Twitter and Facebook if this was helpful to you. Also, if you have ideas and tips for improving website speed, please share them in the comments.
Related Content
- Why Website Speed is Important
- Speed Up Your Web Development Workflow with Grunt
- 13 Reasons Why You Should Pay Attention to Mobile Web Performance
- 10 Excellent Web Performance Optimization Blogs
 Pedro Semeano is a freelance full-stack web developer based in Portugal. Connect with him on his site, semeano.me, as well as on Twitter and Github.
The post A Modern Approach to Improving Website Speed appeared first on Six Revisions.
Related Posts


The new brand identity
When you are alone for days or weeks at…