Ted’s business is growing, and his customers love his products. He wants to expand his efforts by selling his products online. Ted already has a website for his business, but he doesn’t know how to set up his site to sell products effectively.
If you’re like Ted, you’re wondering how to add an online store to your website.
Luckily for you, we’ve got all the information you need to add ecommerce functionality to your website!
Keep reading to find out how to set up an ecommerce store for your business. Plus, get some bonus tips on how to make the most significant impact selling online!
And if you need help building an online store for your business, Tested Technologies is here to help. We’ve got a team of over 250 award-winning designers that can help you create an ecommerce store that will earn more sales for your business.
We don’t just want to tell you about the beautiful work we do.
WE WANT TO SHOW YOU
We’ve built over
Websites in industries like yours
View our past work
How to add an online store to your website
So, you want to add a store to your website to sell your products, but how do you do it? There are a few options for your business, but they depend on your website’s situation. Here are four ways to add an online store to your website.
1. Add ecommerce features to your self-supported website
When to use this strategy: When you have a site that you host (not hosted by a third-party) and you want to add ecommerce capabilities to it.
The first option to add a store to your website is to integrate ecommerce functionality into your website. This option is great if you have full permission to edit your website on your own.
You can easily add payment gateways and shopping carts to make your site ecommerce capable.
To add ecommerce functionality to your current website, you can use numerous third-party tools to help you integrate ecommerce functionality. Here are a few good ecommerce integration tools:
Snipcart

Cost: Standard plan is 2% per transaction, plus payment gateway fees, custom quote for special plans
The first tool you can use is Snipcart. Snipcart is a shopping cart platform that enables you to add ecommerce functionality to your website. It uses HTML and Javascript to integrate the cart into your site.
This tool works with many content management systems (CMS), as well as sites that don’t run on a CMS. Snipcart allows you to add product attributes to your goods to create a transactional platform. This tool makes it quick and easy to integrate a shopping cart fast, saving you time.
Here are a few highlight features of Snipcart:
- Mobile-friendly and responsive shopping carts
- Subscription and recurring payment capabilities
- Ability to sell physical and digital goods
- Develop custom promo codes and coupons
- Multiple payment support options
- Automatic email invoices and confirmations
Selz

Cost: $26-$599 per month
Another option to add a store to your website is Selz. Selz enables you to build an ecommerce storefront on your existing website.
One of the biggest benefits of this tool is that it makes it easy for you to integrate buy buttons into your website. You can customize and design buy buttons without complicated coding or hassle.
Selz also provides you with an easy-to-use shopping cart for your customers. Their shopping carts come equipped to add products as users shop and review them before checking out. If a customer abandons their cart, Selz can send reminders to shoppers.
Here are a few highlight features of Selz:
- Built-in payments
- Security for your store
- Customized buy buttons that match your business’s style
- Mobile-friendly shopping carts
Shoprocket
Cost: $7 – $99/month
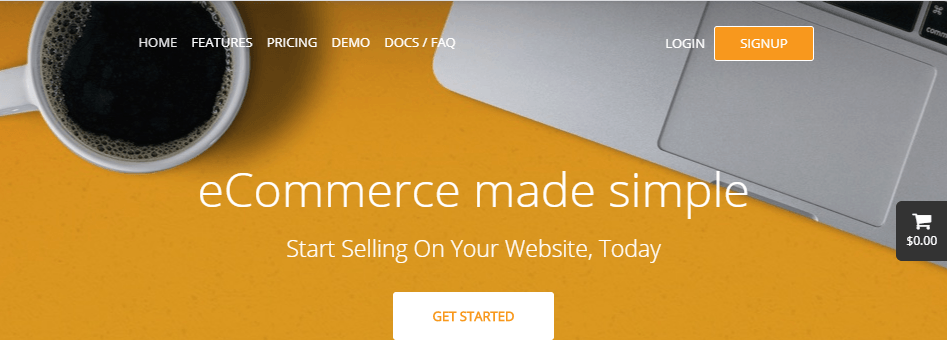
The last tool we’ll look at that can help you add ecommerce to your website is Shoprocket. As they boast on their website, Shoprocket can get you up and selling products in five minutes. All it takes is copying and pasting their code into your website.
Shoprocket is an excellent option if you’re looking to add ecommerce functionality to your website. This tool integrates seamlessly into your website, so you can keep users engaged on your site while they buy. Shoprocket gives you the ability to manage your product options and customizations, too, so you can deliver the right information about your products.
Here are a few highlight features of Shoprocket:
- Accept payments on your site — no gateway payment set up
- Synced inventory
- Coupon and discount code generation
- Digital and physical product sales
- Easy shipping setup
2. Use a plugin to add a store to your website
When to use this strategy: You have a site that’s built on a third-party platform, like WordPress or Joomla, that offers a plugin to add ecommerce functionality to your site.
If you want to know how to add an online store to your website, see if your site provider offers plugins. This option only applies to companies that built their sites on third-party platforms that aren’t made with ecommerce functionality.
For these sites, you need an ecommerce plugin. So, if your site is hosted on a CMS platform like one of these, you can search in your respective site’s store for an ecommerce plugin.
We’ll use WordPress as an example for this one.
So, if you go to WordPress’s plugin page and search “ecommerce” in the search bar, you’ll find that the first result is for WooCommerce. WooCommerce is WordPress’s most popular ecommerce integration.
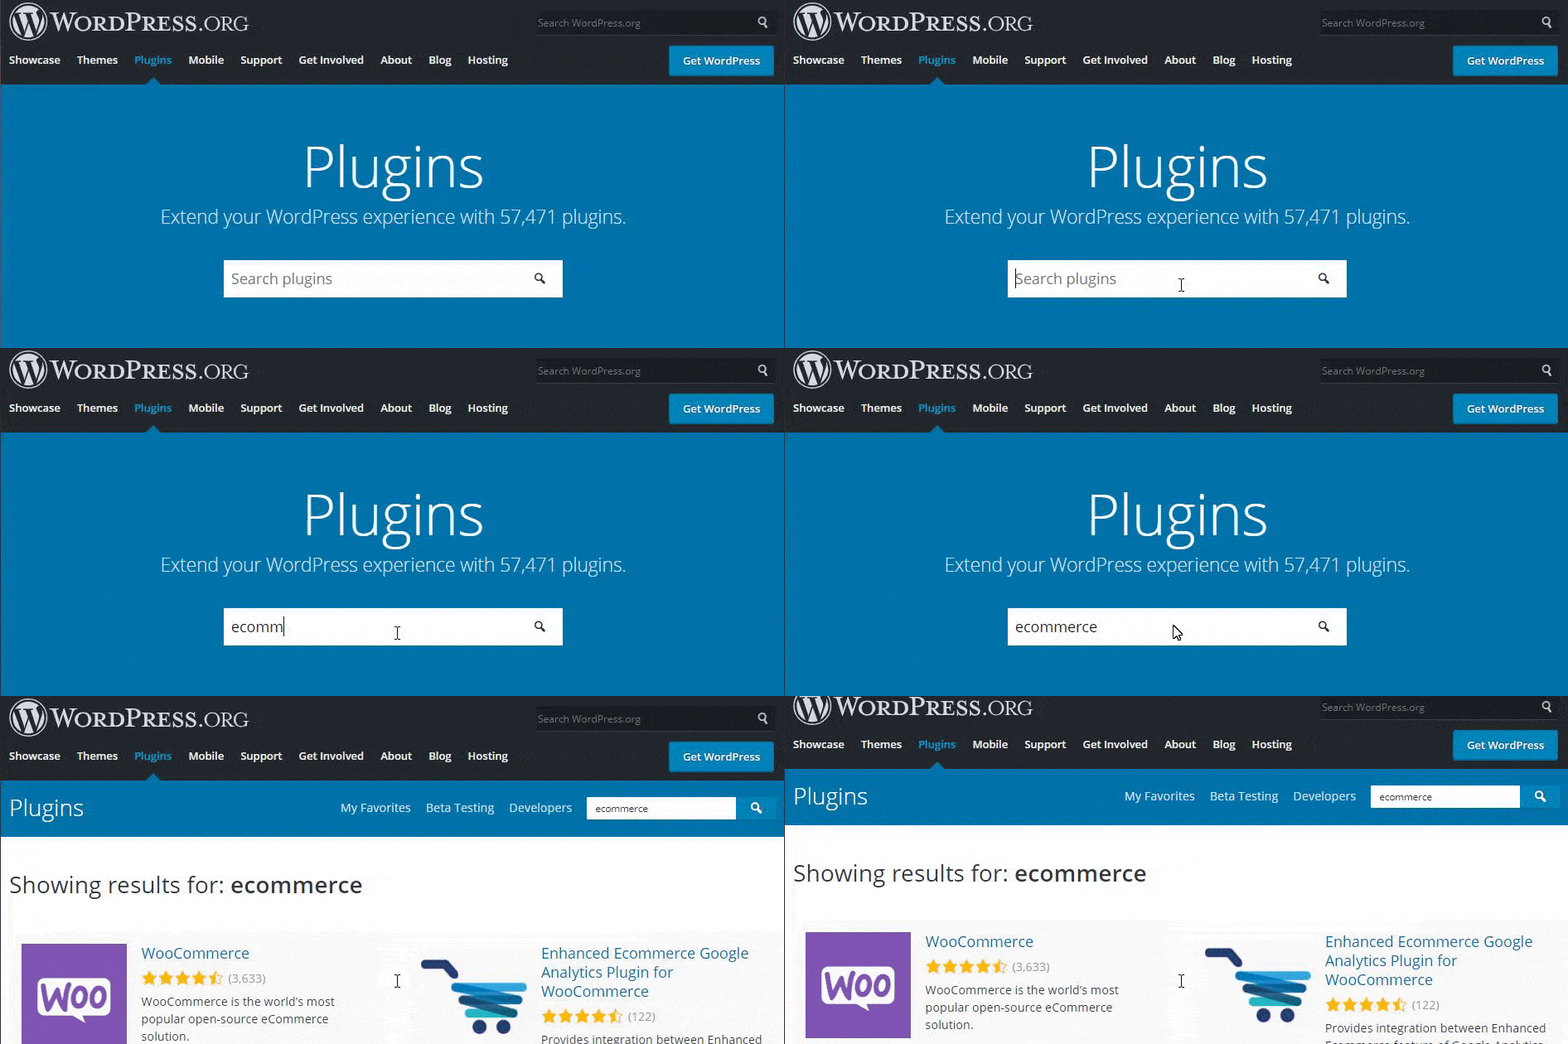
WooCommerce is the all-in-one package for ecommerce functionality on WordPress. This plugin enables your business to:
- Create a custom storefront
- Customize product pages
- Optimize shop pages for search engine optimization (SEO)
- Set payment and shipping options
- Own and control customer data
- And more
To get WooCommerce on a WordPress site, you can use a manual or automatic installation. Manual installation requires downloading the plugin and uploading it to your File Transfer Protocol (FTP). You can also opt to automatically install the plugin by letting WordPress handle the file transfer.
WordPress provides installation options and steps on each plugin so that you can reference them for guidance.
Overall, adding an ecommerce plugin to your existing website is relatively easy. You just need to find the right one and integrate it into your site to start selling your products.
3. Use the Shopify Buy Button
When to use this strategy: If you’re looking for a fast and easy solution to make your site ecommerce functional and only have a few products on your site.
Another option to add ecommerce to your website is to use the Shopify Buy Button. When you use this tool, you get an embeddable product cart and checkout that you can incorporate on your site. You can set up code for individual products and collections.
It’s a simple solution for making your site shoppable. When you use the Shopify Buy Button, you can create a user-friendly shopping experience. From mobile-friendly checkout carts to secure shopping experiences, Shopify offers everything you need.
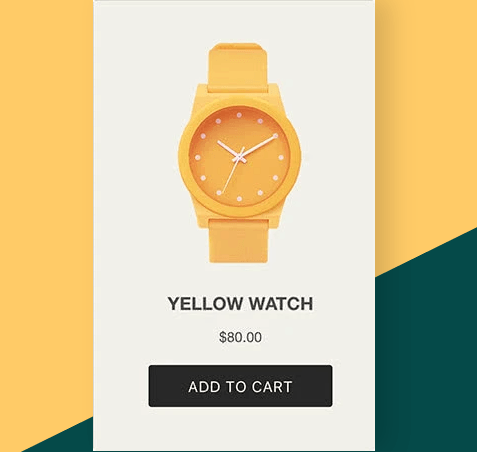
Shopify makes it easy for you to customize your shopping experience, too. You can build buttons and carts that match your business’s style, creating a more cohesive shopping experience on your website.
You can use the Shopify Buy Button on your self-built site, as well as these site builders:
- Weebly
- WordPress
- Squarespace
- Wix
Additionally, it costs $9 per month to have this button on your site.
4. Build a separate website
When to use this strategy: You don’t have editing permissions or the ability to integrate ecommerce with your specific site host.
The last method we’ll look at with ecommerce for websites is building a separate website. You may have a website where you don’t have permission to edit the site to add ecommerce functionality, or you’re hosting your site on a platform or with software that doesn’t support ecommerce.
When you already have an established website, you don’t want to sacrifice all the hard work you put in just because you need ecommerce functionality. So, when you don’t have the option to make your site ecommerce functional, the next best step is to create a separate site.
You can use any ecommerce site provider to build a separate store. Some popular sites include:
- Shopify
- BigCommerce
- Volusion
- Wix Ecommerce
- Squarespace Ecommerce
You can also opt to host your ecommerce site for more customization and control.
Once you find the right platform or decide to host and create your site, you can start building your ecommerce website.
When you build a separate shop, you must try to make your shop match your site’s current design as best as possible. Users want to have a seamless experience and feel like they’re shopping on one website.
If you carry your site’s current design into your ecommerce store, you’ll provide a better user experience for your audience. It will help you increase sales for your business by creating a cohesive experience that keeps users engaged.
Once you implement your brand’s design into your website, you’ll want to add all your products. Make sure you include critical information like:
- Product name
- Price
- Category
- Product descriptions
- Product options (colors, sizes)
Additionally, don’t forget to set up payment method options for your shoppers. Your payment options may vary depending upon the platform you use and what it supports, but make sure you review all your payment options and select the ones you want to make available to shoppers.
Regardless of the platform you use, it will take time to build and develop your separate ecommerce site. You’ll want to preview your work and test different elements as you go to ensure you’re making the best ecommerce website for your company.
Once you’re satisfied with your site, you can publish it. After publication, you can add links to call to action (CTA) buttons to guide people to buy your products on your ecommerce site.
So, let’s say that Hydro Pack hosted their products on a different site. On the front of their page, they have a graphic for their insulated lunch box, followed by a CTA button that says “Shop Now.” If they hosted their products on a separate site, they could link to their site through that CTA and direct users to their shop.

This example is how you would link to your ecommerce site from your website. You can place CTA buttons next to product photos and direct people to the specific product page on your ecommerce site.
Out of all your options, this option will take the longest because you’ll have to build an entirely separate site to add a store to your website. You may want to consider hiring a professional ecommerce company to develop your ecommerce site for you if you don’t have the time to dedicate.
5 ecommerce tips for success and sales
You learned how to add an online store to your website, but that’s only the first step in the journey. Once you have ecommerce functionality, you must learn how to sell online. Here are five tips for selling your products online:
1. Have a plan for fulfilling orders
Before you add a store to your website, you should establish how you plan to fulfill orders. You need to have these plans in place so that when you start selling online, you don’t feel overwhelmed or unsure of how you’re going to process orders.
You’ll want to establish crucial information like:
- Shipping options and rates
- Packaging materials
- Inventory management
- Return process
These are vital pieces of information that you must establish to ensure your ecommerce site is a success.
2. Promote your online store
Once you add ecommerce to your website, you aren’t done. You need to promote your store and let users know that they can purchase your products.
There are numerous tactics you can use to promote your online store, including:
- Ecommerce SEO
- Ecommerce pay-per-click (PPC) advertising
- Social media advertising
- Email marketing
- Social media marketing
- Content marketing
- Video marketing
These tactics can help you reach more shoppers and put your products in front of interested leads. You’ll want to figure out which marketing strategies work best for your business and help you get the most customers.
3. Focus on the user experience
Ecommerce for websites heavily involves optimizing for the user experience. If you want people to visit your site and continuing browsing your products, you need to provide them with a great experience. Poor user experience will lead to a high bounce rate and more abandoned carts.
So, how do you create an ecommerce site that’s user friendly?
Create a beautiful design
Did you know that 75% of opinions on website credibility come from your design? You need a beautifully designed site to create a positive first impression of your business and keep leads on your site. After all, 94% of first impressions relate to web design.
So, when you design your ecommerce site, make sure it’s visually appealing. Stick to three to four colors on your site and use web-friendly fonts. Also, make sure you utilize white space, so you don’t overcrowd your site.
Create simple navigation
A crucial component of your website is your navigation. When users want to find products on your site, you need to make it easy for them to find exactly what they’re looking for — and fast.
Keep your navigation simple. Don’t overload your navigation bar with a ton of sections. You can also utilize subcategories to help organize your navigation further.
You can aim for super simplistic navigation, like Hydro Flask’s. They feature three simple categories that break down into smaller subcategories.

Or, you can opt for a more intricate, but still organized, navigation bar like Burt’s Bees.

The navigation you use will depend upon how many product and product categories you offer. You may need to test different navigation types to see what works best for shoppers.
Fast-loading, mobile-friendly site
The last two components we’ll look at for a user-friendly site is fast load times and mobile-friendliness. If you want to deliver the best experience, you need a site that loads quickly and works on all devices.
To have a fast loading site, you first need to check your site’s load time using Google PageSpeed Insights. It will help you see how fast your site currently loads and what changes you can make to improve load times.
To have a mobile-friendly site, you need to integrate responsive design. Responsive design ensures your website adapts to whatever device a user uses, from tablets to smartphones.
If you aren’t sure how to integrate either of these elements into your site, you can always invest in page speed services and responsive design services from a digital marketing company.
4. Test everything
The first version of your ecommerce site will not be the best. There’s always room to improve, so you don’t want to create your site and forget about it. You must keep testing different elements on your site to ensure you’re delivering the optimal experience to your audience.
You can conduct A/B tests to help you figure out which elements work best on your site.
When you test different elements on your site, make sure you test them one at a time. If you try too many elements at one time, you’ll muddy the results and won’t know if the changes you made impacted your website.
You can test various elements on your ecommerce store, including:
- Forms and submission boxes
- CTA buttons (color, style, etc.)
- Header font size
- Font styles
- Words and phrases in titles, headings, and subheadings
- Images
- Product placement on website
Testing these various elements will help ensure that, when you add a store to your website, you’re creating the best possible ecommerce experience for your audience.
5. Make sure your ecommerce site is SEO-friendly
Whether you add ecommerce to your website or build a separate ecommerce site, you must ensure that everything is SEO-friendly. If your ecommerce site isn’t SEO-friendly, you won’t rank in search results, and people won’t find your products.
So, how do you ensure your site is SEO-friendly?
Many of the practices you follow to create a user-friendly experience help with your SEO. These practices include:
- Ensuring your site loads quickly
- Ensuring your site works seamlessly on mobile
- Having simple and easy-to-use navigation
- Having beautiful navigation
In addition to following user-experience best practices, there are other ways to ensure you create an SEO-friendly ecommerce store.
Optimize for relevant key terms
If you want your site to appear in relevant search results for your products, you need to ensure you’re integrating the right keywords into your product pages. Keywords determine where your products appear in search results, so you must optimize for the right terms.
You can conduct keyword research to help you find relevant terms. A tool like KeywordsFX will help you generate applicable terms that you can integrate into your product listings.
When you conduct keyword research, stick to long-tail keywords, which contain three or more words. Long-tail keywords are better for your product listings because you drive traffic that’s more interested in the products you offer.
If someone searches “rain boots,” they may be interested in your business, but if someone searches “women’s purple rain boots,” you know you offer what they need. When you use more specific keywords, you drive more qualified traffic.
Optimize title tags and meta descriptions
These two core elements are fundamental to helping your product pages rank in search results. Your audience sees the title tag and meta description for your product page first — it helps them determine if your listing is relevant to their needs.

For your title tag, you’ll want to focus on keeping it within the 60-character limit. Make sure you include your core keyword towards the front. Make your titles engaging and informative to entice people to click on your listing!
For your meta description, you’ll want to keep your description within the 155-character limit. Provide your audience with information about what to expect on the page. Don’t forget to include your core keyword in here, too!
Partner with Ecommerce masters!
Campaigns managed by Tested Technologies have earned over
TRANSACTIONS IN THE LAST 5 YEARS
Read Case Studies
How to add an online store to your website: Hire the experts
After learning how to add an online store to your website, you may feel overwhelmed. Where do you start, and how do you know what option is best for your business?
Well, what if I told you that you could add a store to your website without lifting a finger?
At Tested Technologies, we have a team of over 250 design experts that have created ecommerce sites for over 20 years. We know how to build ecommerce websites that help you sell more products and grow your business online.
Not to mention, in the past five years, we’ve managed over 11.6 million transactions and driven over $2.4 billion in sales for our clients. We can drive results with your ecommerce site, too.
We know how to add an online store to your website and can build you a separate ecommerce site if you need it. We’ll deliver an SEO-friendly website that drives more leads and revenue for your company.
Want to learn more? Contact us online or call us today at 0802-583-7481 to speak with a strategist about our ecommerce web design services!
The post How to Add an Online Store to Your Website [4 Ways] appeared first on Tested Technologies Blog.
Related Posts
August 6, 2016
11 Sites to Help You Find Material Design Inspiration
September 6, 2015
Infographic: 69 Web Design Tips
June 5, 2015


