Introduction

Pages is a fantastic program used to create visually appealing documents, but you might not realize how versatile it is. It can also be used to create digital books for the iBooks app, and sold on the iBooks Store.
This conversion from Pages to iBooks is done via the ePub file format, which is used for digital books on Apple’s iBooks app on both OS X and iOS. With Pages for OS X you can export a text document straight into ePub, and import it directly into iBooks for OS X.
For those looking to self-publish, in Pages you can add Retina display-quality images, chapters, headings, custom artwork, even video clips. Pages turns it into an ePub you can share, or even sell on Apple’s iBooks Store.
Step 1
The text document
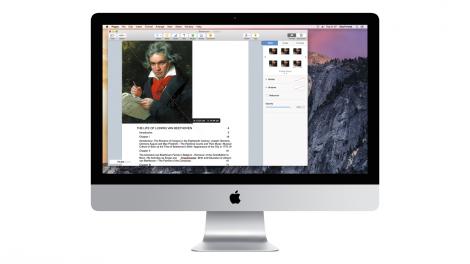
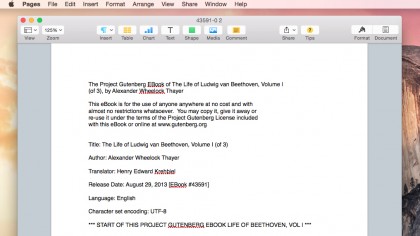
Open your soon-to-be book’s text file in Pages; in this example, we’re using The Life of Ludwig van Beethoven by Alexander Wheelock Thayer from Project Gutenberg (gutenberg.org), downloaded as a text file, to turn from plain text into a media-rich, digital book.
Step 2
Use the Format window
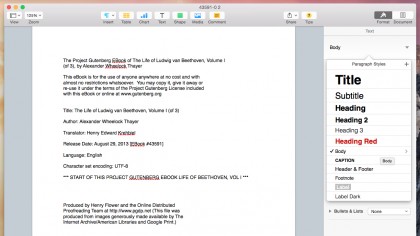
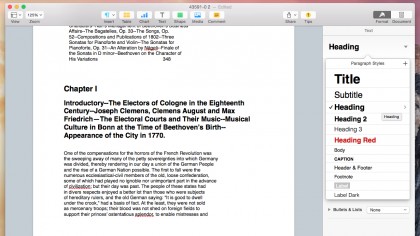
It’s possible to turn a text document straight into a digital ePub file using the guide in Step 8. But digital books are far more friendly if you format the text first. Choose View > Inspector > Format. Click the Paragraph Styles area to view the text styles available.
Step 3
Change the title
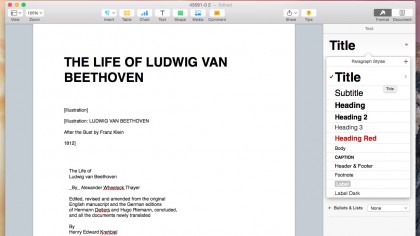
Find the book’s title (or write it in full). Highlight the text and choose Title from the Paragraph Styles menu (Format bar). Styling up the title is important because Pages uses it to list the book in various areas, such as Contents. Only use this Title style once.
Step 4
Add chapter headings
You use Styles to identify chapters. These are then used to create the contents. Find the first chapter title and change its style to Heading. For a sub-title, change its style to Heading 2. You can also use Heading 3 and so on, but it can make the contents look cluttered.
Step 5
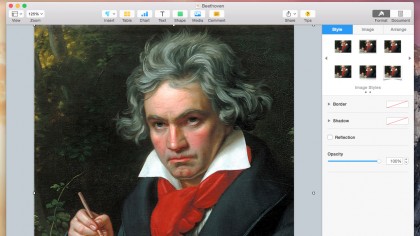
Cover image
Create a cover image by going to the start of the text and choose Insert > Page Break. Now drag an image file to the first page. Click the image, drag it so it snaps into position, then use the drag handle (bottom right) to resize it. You want it to fill up the entire page.
Step 6
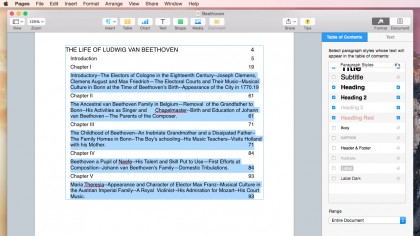
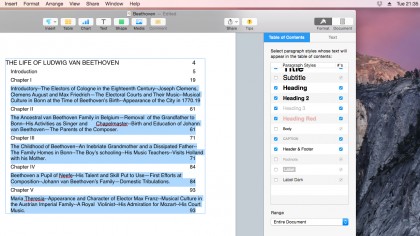
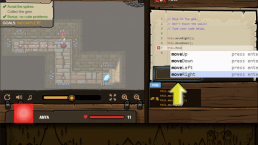
Create the chapter list
At the start of your text (after the image) choose Insert > Table Of Contents > Document. A Generating Table Of Contents box appears. You’ll see a box displaying the title and headings marked with the Styles. This appears when you click Contents in iBooks.
Step 7
Adding video
For the full digital feel, you can even add video clips to ePub documents. Drag a video file from the Finder into the Pages document. The video clip is converted to a iOS-compatible format when you export the file from Pages for OS X.
Step 8
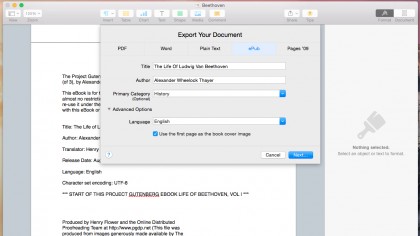
Export the book
To create the book, Choose File > Export To > ePub. Fill out the Title and Author fields, and select a genre for the Primary category. Click Advanced Options; select Use the First Page as the Book Cover Image and click Next. Save when prompted, then click Export.
Step 9
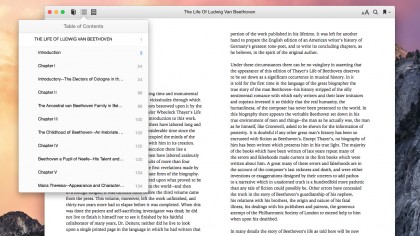
Open in iBooks
Open iBooks and choose File > Add to Library. Select the ePub file and click Add. It appears like any other book in the iBooks app – click to open it. Your first page will be the cover and the Contents icon displays the contents you added using Styles. Enjoy your book!
![]()
Related Posts

Apple to Pay $250 Million Settlement Over Misleading iPhone AI Siri Features
Apple has agreed to a $250 million…

OpenAI in Court: Greg Brockman, Elon Musk, and the Battle Over AI’s Future
OpenAI’s president Greg Brockman takes…

Reggie Fils-Aimé Reveals Why Nintendo Stopped Selling on Amazon in the DS Era
Former Nintendo of America President…

Musk v. Altman: Revealing the Early Secrets of OpenAI
Get an inside look at the Musk v.…

Apple’s “Ultra” Era: The Next Evolution for iPhone and Mac
Apple is rumored to expand its ‘Ultra’…

How AI Is Changing Breakups: A Look at Digital Relationship Endings in 2026
Breaking up is never easy, but in 2026,…

Elon Musk’s Courtroom Performance Raises Eyebrows in Musk v. Altman Trial
Elon Musk appeared less prepared and…

Jury Selection in Musk v. Altman: Public Opinion Challenges Elon Musk in Court
Jury selection in the high-profile Musk…
Google’s New Gradient Icons: A Fresh Look Coming to More Apps
Google is expanding its new gradient…

GPT-5.5: OpenAI’s Latest Breakthrough Is Resetting the AI Bar
OpenAI’s GPT-5.5 has arrived, setting a…

Xbox Game Pass ‘Starter Edition’ Leak: New Bundle with Discord Nitro Revealed
A new leak reveals Microsoft is…

DJI Launches Lito Series: Affordable Entry-Level Drones Starting Under $400
DJI introduces the Lito 1 and Lito X1,…

The End of Human Intimacy: How AI Companions Are Rewiring Our Emotional Lives
Are AI companions truly filling the…


The new brand identity
When you are alone for days or weeks at…