Introduction
Email is a blessing and a curse: while it’s a boon for communication and collaboration we’ve all felt that sinking feeling as we’ve opened up an overstuffed inbox. But it doesn’t have to be that way…
With a few easy tricks and a couple of top tips you can be the master or mistress of mail, eliminating annoyances and reaching the famed state of Inbox Zero. In this article, we’re going to look at how to achieve this in the two most popular email services, Gmail and Outlook.
- You might also want to read: 10 tips, tricks and secrets for Gmail
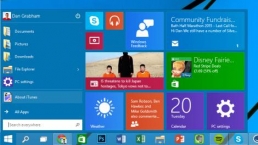
Use conversations

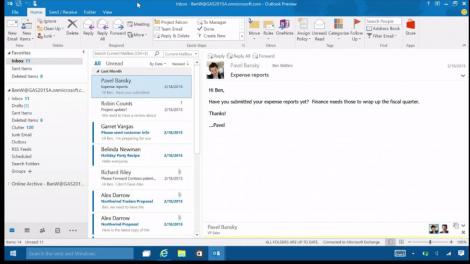
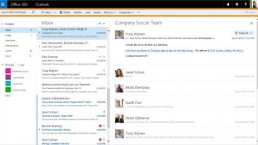
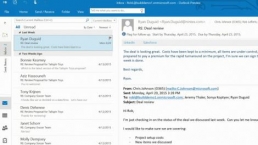
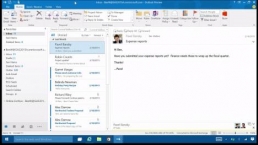
This one’s particularly important in the corporate world, where what should be fairly simple discussions can get bogged down in endless emails about nothing in particular. Both Outlook and Gmail enable you to view your emails in conversation mode, which means every message in a particular thread is collapsed underneath a single email title.
To turn on conversation view in Gmail, click on the gear icon, select Settings and scroll down to Conversation View. Toggle the switch and save your changes.
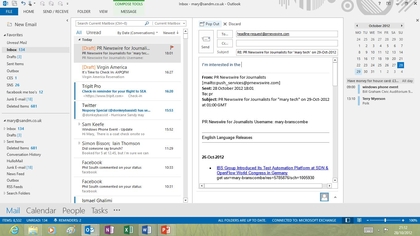
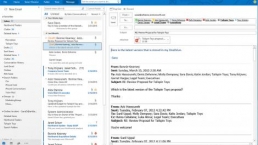
In Outlook, conversations are off by default. To enable them, click on View > Conversations > Show as Conversations. You can also change the settings here to specify how conversations should be displayed. In Outlook.com the conversation option is in Options > Group By Conversation and Pre-Load Messages.
Filter the faff and filth
No matter how good your organisation’s email filters, some spam is going to get through. Thankfully both Outlook and Gmail have some tools that can help you fight the spam menace (and on the desktop you can add more via plugins).
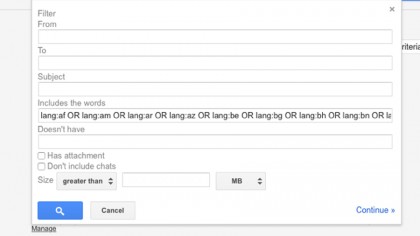
In Gmail, the easiest way to filter unwanted messages is to use the drop-down in the message body and choose Filter Messages Like This. You can then specify what Gmail should do with messages that match the same criteria, such as email address or subject line.
In Outlook, you want Mail > Home > Delete > Junk > Junk E-Mail Options, where you can adjust the level of filtering. If you want you can restrict incoming email to known senders only, although that isn’t really practical in most offices.
In Outlook.com, you can tap Actions > Create Rule to automatically delete unwanted messages.
Get to grips with the good stuff
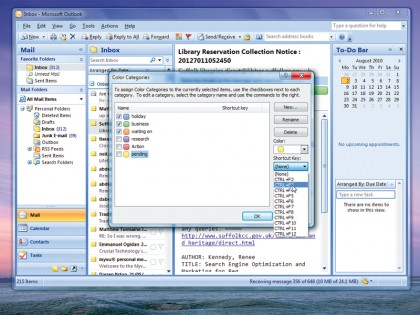
Filters and rules aren’t just for messages you don’t want. They can be useful tools for organising the mail you do want, too. For example, you might create Outlook rules that colour-code messages so you can gauge their importance immediately, or you might create a rule or filter that gives certain messages a category and files them accordingly so you can worry about them later.
Such rules and filters are also a good way of keeping legitimate messages out of your spam filter, or of forwarding messages that aren’t your department, and it’s easy to create very complex rules – so for example you can have different outcomes based on whether incoming messages have file attachments or include certain words.
Unsubscribe from everything
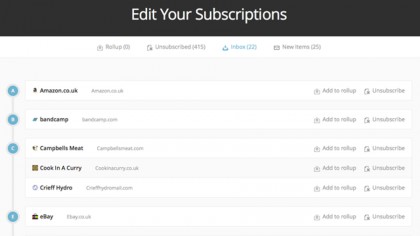
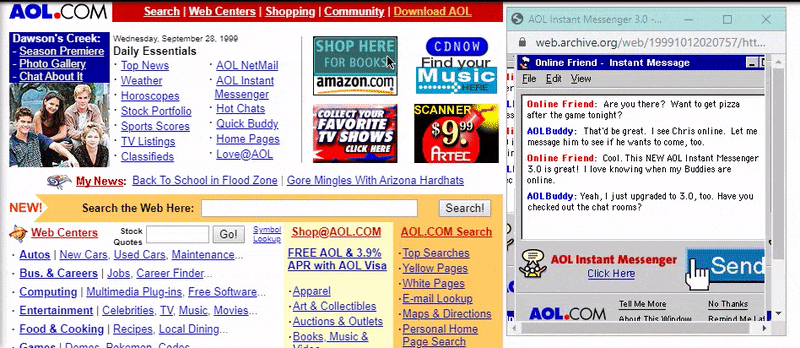
Over time, there’s a good chance you’ll end up subscribed to all kinds of things – often without asking. That’s where the superb Unroll.me website comes in. It works with Gmail and Outlook.com (as well as Hotmail, AOL Mail and iCloud), and it can do two handy things: it can roll all your subscription emails into a regular digest, keeping your inbox tidy, or it can automatically unsubscribe you from mailing lists you don’t want. We used the latter option and discovered we’d been subscribed to more than 200 mailing lists we didn’t want to be on. It’s a fantastic tool.
Use aliases
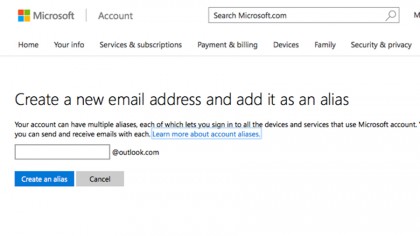
Aliases – having multiple email addresses for the same account – are a great way to categorise incoming email, and they’re handy weapons in the war against spam too. In Outlook.com you can add additional Outlook.com email addresses to your existing account, while in Gmail you can add anything after the first part of your email provided you do it with a plus sign – so for example karen.smith+notes@gmail.com would go to karen.smith@gmail.com. You can then set rules or filters to look for your aliases and process them accordingly, for example by sending them straight to your spam folder.
Set up Quick Steps
This one’s Outlook-only – in addition to Rules, Outlook has Quick Steps to help you organise your inbox. The difference between Quick Steps and Rules is that the former are run manually while the latter are automatic. A Quick Step is a fast way of applying multiple actions to a message or group of messages, and Outlook comes with predefined ones such as Move to Folder or Reply & Delete. By creating a Quick Step and adding it to your Quick Access toolbar (under the lightning bolt icon) you can turn many email processing jobs into one-click efforts.
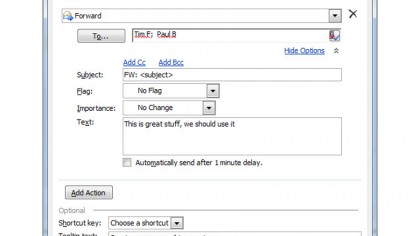
Create canned responses
You’ll often find yourself essentially writing the same message again and again to multiple people, so why not automate it? Outlook’s Quick Parts are a blessing here: create an email, write the bit you don’t want to write ever again, then click on Insert > Quick Parts > Save Selection to Quick Part Gallery. The next time you need to send that message, put the cursor in the body of the message and click Insert > Quick Parts and then select your canned response.
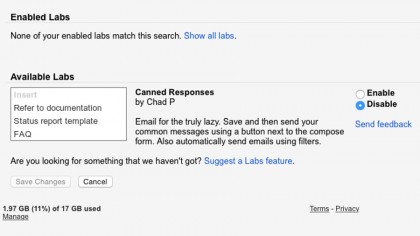
The process is similar in Gmail but you need to go to Settings > Labs and look for the Canned Responses option. Click Enable to turn it on.
Use Autocorrect
Canned responses can be overkill for a lot of messages, but there’s another way to speed up your email composition and replies. One massive time-saver is to use autocorrect as a form of shorthand, so for example you could replace a long email address with “eml”, a postal address with “addr” or a sign-off with “regrd” so the full text magically appears when you type the correct command.
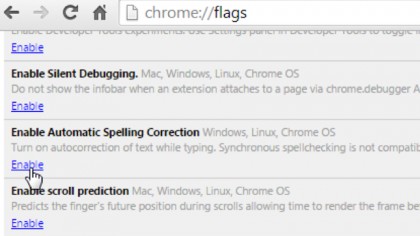
In Outlook, you can define your Autocorrect entries in File > Options > Proofing > Mail > Spelling and Autocorrect. For Gmail you’ll need to do it at the operating system level using a third-party app, or via a Chrome flag: type chrome://flags in the address bar and look for Enable Automatic Spelling Correction.
Use task lists
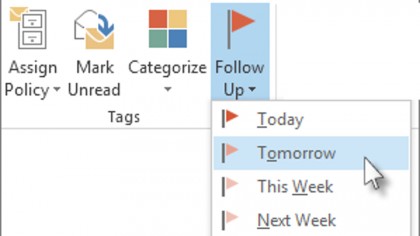
One of the most practical ways to manage your email is to use to-do lists – flagging a message for future action is only useful if you remember to come back to it, and to-do lists are a great way of ensuring that you do. In Outlook you can flag an email message for follow-up by right-clicking the flag icon and setting a reminder time, or you can drag the message to the To-Do Bar to create a to-do item.
In Gmail, click on Gmail > Tasks to bring up the Tasks List. To add a mail message to it, click on the message’s More drop-down and select Create Event. This adds the event you create to your Calendar.
Do it now
One school of thought says you should only ever read a message in your inbox once: if you just let it sit there, you aren’t organising your email effectively enough. Instead, you should take immediate action – delete it if it’s irrelevant, delegate it if it’s someone else’s job, archive if you don’t need to do anything or flag it to come back to later.
The end result of that should be the much-vaunted Inbox Zero – or at least it will be until someone emails you and spoils it. The method does work, but it’s best suited to infrequent raids on your inbox – if you attempt to process every email as soon as it arrives, you’ll find it hard to get anything else done.
![]()
Related Posts

Apple to Pay $250 Million Settlement Over Misleading iPhone AI Siri Features
Apple has agreed to a $250 million…

OpenAI in Court: Greg Brockman, Elon Musk, and the Battle Over AI’s Future
OpenAI’s president Greg Brockman takes…

Reggie Fils-Aimé Reveals Why Nintendo Stopped Selling on Amazon in the DS Era
Former Nintendo of America President…

Musk v. Altman: Revealing the Early Secrets of OpenAI
Get an inside look at the Musk v.…

Apple’s “Ultra” Era: The Next Evolution for iPhone and Mac
Apple is rumored to expand its ‘Ultra’…

How AI Is Changing Breakups: A Look at Digital Relationship Endings in 2026
Breaking up is never easy, but in 2026,…

Elon Musk’s Courtroom Performance Raises Eyebrows in Musk v. Altman Trial
Elon Musk appeared less prepared and…

Jury Selection in Musk v. Altman: Public Opinion Challenges Elon Musk in Court
Jury selection in the high-profile Musk…
Google’s New Gradient Icons: A Fresh Look Coming to More Apps
Google is expanding its new gradient…

GPT-5.5: OpenAI’s Latest Breakthrough Is Resetting the AI Bar
OpenAI’s GPT-5.5 has arrived, setting a…

Xbox Game Pass ‘Starter Edition’ Leak: New Bundle with Discord Nitro Revealed
A new leak reveals Microsoft is…

DJI Launches Lito Series: Affordable Entry-Level Drones Starting Under $400
DJI introduces the Lito 1 and Lito X1,…

The End of Human Intimacy: How AI Companions Are Rewiring Our Emotional Lives
Are AI companions truly filling the…


The new brand identity
When you are alone for days or weeks at…