Introduction

Think you understand everything about today’s technology? It’s time for a reality check. Mine was just a few years ago. It didn’t involve getting schooled on the internals of computers or learning the differences between operating systems. No, all it took was the humbling experience of witnessing a person with a vision impairment navigate an iPad, a device that I naively assumed could only be used by those with the ability to see.
She was able to use this technology thanks to accessibility options, which enable some awesome tricks to help those in need of assistance. Your iOS device packs some incredibly smart features that help people of nearly all circumstances revel in the joys of some of today’s coolest tech – you just haven’t found them yet.
Here’s a full breakdown of the built-in features that offer clever ways for those with hearing, vision and physical impairments to enjoy the iPhone and iPad.
Siri, the intelligent personal assistant
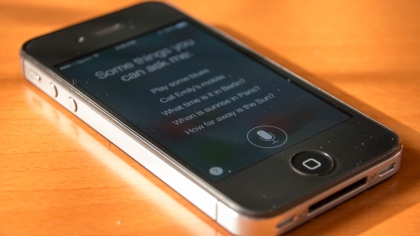
The intelligent personal assistant inside of iOS devices has a simple goal: to help you find your content easily, send messages and discover new information using nothing more than your voice. Siri is a well-known feature, but it doesn’t get enough credit for its potential as an aid for those with physical and vision impairments.
-To activate Siri, press and hold the home button on an iOS device for a few seconds. Once you hear the double-chime, Siri’s ready to assist.
-Saying “Hey Siri” can also grab Siri’s attention. To enable this feature, open up the Settings menu. From there, navigate to “General”, then tap into “Siri” and finally, select “Allow ‘Hey Siri'”.
-Apple included a swath of different languages and regional dialects in case you want to change Siri’s spoken language. From the same menu where you enabled “Hey Siri”, scroll down just a bit to find the language settings.
Siri customization doesn’t stop there. You can even change its voice from female to male or vice versa. Go on, ask it something!
VoiceOver
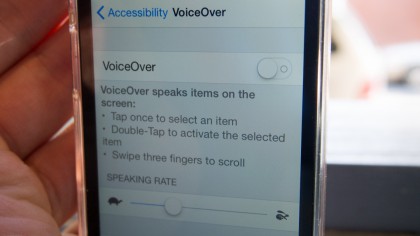
VoiceOver is the key feature that makes using iOS devices more intuitive for vision-impaired individuals. This feature switches the default navigation that previously relied on precise finger presses in favor of one where broad strokes and gestures can complete just about any task.
-To activate it, press and hold the home button to get Siri’s attention and then say “Turn on VoiceOver.” Alternatively, scroll down through the Settings menu until you find “Accessibility”. Click “VoiceOver” and slide the switch over to turn on the feature.
-Once activated, swipe left or right anywhere on the screen to move the selector, which will cue VoiceOver to read the selection out loud. If you come to an area of interest that you would like to click further into, tap the screen twice.
-Turning on the VoiceOver feature also activates sound effects that will trigger to give the user audible feedback on their gestures and touches. These can be turned off from the same menu.
-VoiceOver can also aid in reading notifications, such as incoming e-mails, text messages, out loud as they arrive on your iOS device.
Similar to Siri, VoiceOver’s spoken language or regional dialect can be changed. However, in addition to Siri’s more limited settings, users can download higher-quality voices that sound more realistic when using VoiceOver.
Zoom

It’s time to throw away that magnifying glass. Your iOS device contains a built-in feature that does more than take its place. It offers a ton of extra functionality that the physical tool just can’t match up to.
-The Zoom feature allows you to magnify a section of the screen to increase readability. To activate the feature, navigate to “Accessibility” inside the Settings menu. Then, tap into “Zoom” and tap the switch.
-Double-tapping the screen with three fingers will bring up the Zoom window, which zooms in on a body of text or photo.
-From there, you can drag the window around the screen as you please by pressing and holding a finger on the Zoom anchor on the bottom of the magnified window.
-Zoom is set at a default magnification level, but the intensity can be increased up to 15 times the default font size. This can be done at the bottom of the Zoom menu.
-Users can adjust the size of the magnifying window itself and the lighting filter which you can view text and pictures through (Grayscale, Low light, Grayscale Inverted, Inverted.)
Features to increase screen readability
iOS devices offer a few features to make words more legible and pictures easier to see on the screen.
-In the Accessibility menu, select “Larger Text” to enable the feature, then customize your preferred font size to improve readability while using an iOS device. If that doesn’t do the trick, the font can also be bolded by flipping the switch next to “Bold Text”.
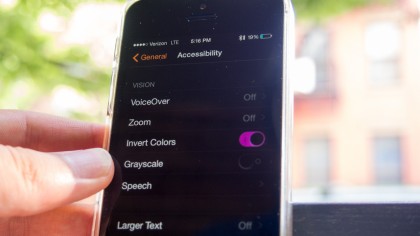
-For individuals that are sensitive to certain colors, the options to increase color contrast, invert or set the screen’s color palette to grayscale are each readily available in the Accessibility options.
How iOS devices assist hearing-impaired individuals

iOS offers a few neat options in the Accessibility menu to assist users with hearing impairments.
-In the Accessibility menu, users can pair a Bluetooth-enabled hearing aid to their iOS device through the “Hearing Aids” option. Once tethered, all audio (music, podcasts, movies) will stream to the hearing apparatus similar to how streaming audio works with wireless headphones.
-If hearing your phone when it rings is an issue, the LED on the back of iPhones (versions 4 and newer) can be activated to flash whenever you receive a text or call. It’s a subtle alert, but very noticeable. Activate this feature by toggling the switch next to “LED Flash for Alerts”.
-iOS devices across the board offer robust support for subtitles and closed captioning. Located inside the Accessibility menu, “Subtitles and Captioning” allows users to activate and customize how the overlaying text will look. The feature supports over 50 different font styles, four font sizes ranging from small to extra large and eight font colors to choose from.
-Users can adjust the audio balance from left to right in order to receive the full audio delivery in the ear that serves you the best. The slider is located in the Accessibility menu.
How iOS devices assist physically-impaired individuals
iOS is full of cool features that can be accessed with gestures like swiping and pinching the screen. And thankfully, Apple has also made these unique functions easily accessible for those with physical disabilities.
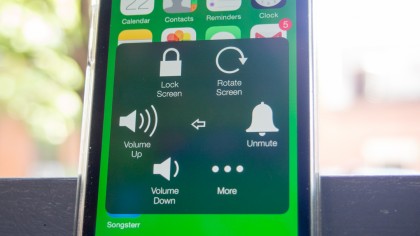
-AssistiveTouch condenses every gesture-activated feature into one virtual button placed front and center on the screen for easy access. To activate this feature, scroll to the bottom of the Accessibility menu and click through to find the toggle switch.
-Once activated, a virtual button in the shape of a square appears on screen. Interacting with a simple tap blossoms the button into a full-fledged menu where you can fly through settings and dive into features that are usually multiple layers of navigation deep, like Siri and Safari.

-Also in the Accessibility menu, users can create custom gestures for their iOS device. These can be used to perform a variety of tasks, such as unlocking the device or typing a quick text message. If you’re a gamer, you could even program gestures to control a game’s menu with ease.
iOS devices also support the use of external switches in place of using the touchscreen to perform functions. The support for switches ranges from external physical buttons to cameras that can track head movement to navigate around the phone or tablet.
Know of any other neat tricks that iOS devices can do? Be sure to let us know in the comments.
![]()
Related Posts

Apple to Pay $250 Million Settlement Over Misleading iPhone AI Siri Features
Apple has agreed to a $250 million…

OpenAI in Court: Greg Brockman, Elon Musk, and the Battle Over AI’s Future
OpenAI’s president Greg Brockman takes…

Reggie Fils-Aimé Reveals Why Nintendo Stopped Selling on Amazon in the DS Era
Former Nintendo of America President…

Musk v. Altman: Revealing the Early Secrets of OpenAI
Get an inside look at the Musk v.…

Apple’s “Ultra” Era: The Next Evolution for iPhone and Mac
Apple is rumored to expand its ‘Ultra’…

How AI Is Changing Breakups: A Look at Digital Relationship Endings in 2026
Breaking up is never easy, but in 2026,…

Elon Musk’s Courtroom Performance Raises Eyebrows in Musk v. Altman Trial
Elon Musk appeared less prepared and…

Jury Selection in Musk v. Altman: Public Opinion Challenges Elon Musk in Court
Jury selection in the high-profile Musk…
Google’s New Gradient Icons: A Fresh Look Coming to More Apps
Google is expanding its new gradient…

GPT-5.5: OpenAI’s Latest Breakthrough Is Resetting the AI Bar
OpenAI’s GPT-5.5 has arrived, setting a…

Xbox Game Pass ‘Starter Edition’ Leak: New Bundle with Discord Nitro Revealed
A new leak reveals Microsoft is…

DJI Launches Lito Series: Affordable Entry-Level Drones Starting Under $400
DJI introduces the Lito 1 and Lito X1,…

The End of Human Intimacy: How AI Companions Are Rewiring Our Emotional Lives
Are AI companions truly filling the…


The new brand identity
When you are alone for days or weeks at…