
Everybody loves to personalize their iPhones with custom ringtones, but Apple doesn’t make it obvious how to do so – it’s not as simple as assigning one of your songs as a tone. Fortunately, by following this guide, you’ll be able to whip up your own custom ringtones in a jiffy without having to resort to additional apps or anything outside of what’s built right into iOS 8 and Mac OS X Yosemite.
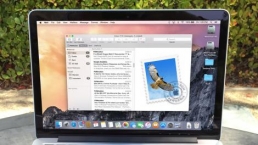
Start the process by opening the sound file you want to set as your ringtone in iTunes on your Mac. You’ll need to export a copy of the song and edit it to a suitable length (30 seconds or less), if necessary. You can edit within iTunes and then export, or, if you wish, you can edit with an additional app (such as QuickTime) after exporting.

For this tutorial, we’ll do the editing from within iTunes itself. Highlight the song, then hit Command + I to get info. Click on the options tab, and adjust the start and stop times to capture the portion of the song you want as your tone. (Of course, if the sound is already less than 30 seconds, this adjustment is optional.) Once you’ve adjusted the length, export the edited song by clicking on File > Create New Version > Create AAC version. You must do this even if the file was already in AAC format! (Also, after you’ve made the copy, be sure to deactivate the start/stop options from the original version of the song so it will play normally the next time you listen to it.)

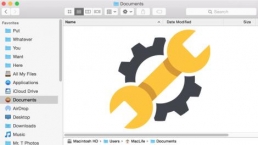
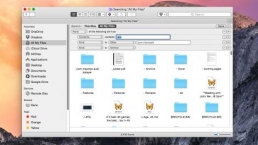
Locate the newly created AAC version in the finder; you should find it in Music > iTunes > iTunes Media > Music > [artist name] > [album name] > [song name], possibly with a “1” added onto the file name. Copy the file and put it somewhere convenient, such as the desktop, then change its file extension from .m4a to .m4r.

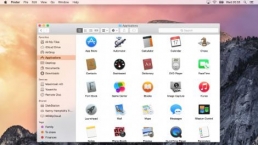
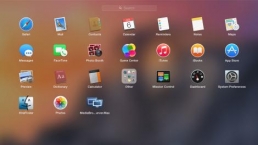
Next, drag the file to the Tones folder (Music > iTunes > Tones), then open it by dragging it to iTunes or double-clicking it. Navigate to the Tones section of iTunes (hit Command + 8 for easy access) and you should see the ringtone there.

In some cases – usually if your original sound file was in a non-AAC format like MP3 or WAV – the ringtone might not show up in the Tones section of iTunes. If this happens to you, it’s best to temporarily delete the original and edited versions of the song from iTunes (highlight each one and press the delete button, but choose to keep the file if you’re given the option), and to move the original m4a file out of its designated folder to someplace safe (again, like the desktop). With that done, drag the m4r file to the Tones folder, then drag it to iTunes or double-click it. The ringtone should now show up in the tones section, at which point you can put the original song back in its designated folder (or simply play it) so it will show up in your music library once again.

Now that you’ve created a ringtone that’s recognized by iTunes, you need to sync it to your iPhone. Connect your iPhone to your Mac, go to the device tab by pressing the button in the upper-left, select the Tones section, then check “Sync Tones” (all tones or selected tones is up to you). When you sync your phone, the ringtones will copy over.
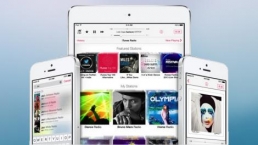
![]()
Related Posts

Apple to Pay $250 Million Settlement Over Misleading iPhone AI Siri Features
Apple has agreed to a $250 million…

OpenAI in Court: Greg Brockman, Elon Musk, and the Battle Over AI’s Future
OpenAI’s president Greg Brockman takes…

Reggie Fils-Aimé Reveals Why Nintendo Stopped Selling on Amazon in the DS Era
Former Nintendo of America President…

Musk v. Altman: Revealing the Early Secrets of OpenAI
Get an inside look at the Musk v.…

Apple’s “Ultra” Era: The Next Evolution for iPhone and Mac
Apple is rumored to expand its ‘Ultra’…

How AI Is Changing Breakups: A Look at Digital Relationship Endings in 2026
Breaking up is never easy, but in 2026,…

Elon Musk’s Courtroom Performance Raises Eyebrows in Musk v. Altman Trial
Elon Musk appeared less prepared and…

Jury Selection in Musk v. Altman: Public Opinion Challenges Elon Musk in Court
Jury selection in the high-profile Musk…
Google’s New Gradient Icons: A Fresh Look Coming to More Apps
Google is expanding its new gradient…

GPT-5.5: OpenAI’s Latest Breakthrough Is Resetting the AI Bar
OpenAI’s GPT-5.5 has arrived, setting a…

Xbox Game Pass ‘Starter Edition’ Leak: New Bundle with Discord Nitro Revealed
A new leak reveals Microsoft is…

DJI Launches Lito Series: Affordable Entry-Level Drones Starting Under $400
DJI introduces the Lito 1 and Lito X1,…

The End of Human Intimacy: How AI Companions Are Rewiring Our Emotional Lives
Are AI companions truly filling the…


The new brand identity
When you are alone for days or weeks at…