1. Introduction

Pointing a camera at a computer screen is never a good idea (hey there, reflections!), which is why the humble screenshot has proved a vital tool over the years.
Whether you need to grab something off a webpage to share with a friend, create instructions or log a receipt of a purchase, a screenshot is a fast and easy way to get the job done.
It’s not always obvious how to take a screenshot, though; while there are a number of keyboard combinations at your disposal, it’s not necessarily clear what they do, or how to execute them to get the screenshot you want. And then there’s the question of what to do with a screenshot – you may want to share it, edit it or send it up to the cloud.
But don’t fret, Mac users: read on for our complete guide on how to take a screenshot, followed up by 10 handy tips of what to do with them afterwards.
- Check out these 50 best mac tips, tricks and timesavers
2. How to take a screenshot on a Mac
OS X is loved by designers and multimedia workers alike for its simple and flexible way of taking screenshots. You can choose to take snaps of the whole screen or just parts of it, in addition to open apps, windows and menus with just a few key combinations.
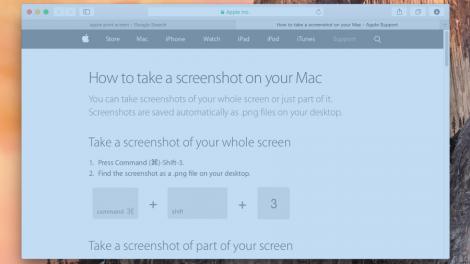
Save the entire screen on the desktop
To take a picture of the whole screen, press Command (⌘)-Shift-3, which will place a screenshot file on your desktop saved as a .png file.
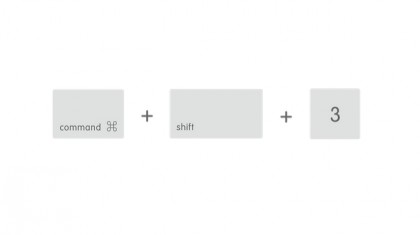
Take a screenshot of part of the screen
If you’re only interested in taking a screenshot of part of the screen, hold down Command (⌘)-Shift-4 to turn the cursor into a crosshair pointer. Move it to where you want to start the screenshot and left-click, before dragging the rectangle over the desired area while holding the mouse button. Let go to turn the selected area into a .png file on the desktop.
Take a screenshot of a window
To precisely take a screenshot of a window and its contents, press Command (⌘)-Shift-4 to turn the cursor into a camera pointer before pressing the Space bar. Move the camera pointer over the window to highlight it a dark share and left-click to save the screenshot as a .png file on the desktop. yo can hit escape before you click to cancel the screenshot.
Take a screenshot of a menu
It’s also possible to take a screenshot of a menu without the title using another handy combination. Hold down Command (⌘)-Shift-4, press the Space bar and left-click on the menu to send it to your desktop in the form of a .png file.
Change the default format and save location of screenshots
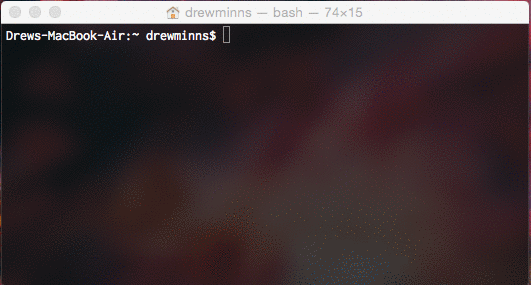
OS X saves screenshots as .png files by default, which can be changed to .jpg by inputting the following command into Terminal:
defaults write com.apple.screencapture type jpg
It doesn’t have to be .jpg either – you can switch the file format to a number of supported extensions such as PDF, tiff, or bitmap, among others, by entering it at the end of the line. When you’re done, enter this command to load the new setting:
killall SystemUIServer
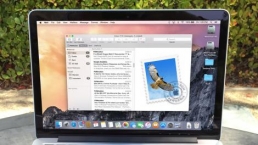
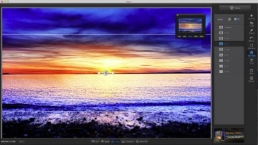
3. Crop, resize, tweak screenshots using Preview
Preview is one of the most under-appreciated apps on Mac. Especially in later versions of OS X, it became hugely powerful, and is great for editing screenshots. For example, you can crop an image. Draw a selection with the regular Rectangular Selection tool then either hit Command+K or choose Crop from the Tools menu. Alternatively, show the Edit Toolbar and make a more complex selection either with the Instant Alpha tool (like in iWork) or use the Smart Lasso.
With this tool, you draw as carefully as you can around the outline of the object and then Preview works out as closely as it can where the edges are. In either case, if the screenshot isn’t already a PNG cropping will convert it so that you can have the thing you’re cutting out on a transparent background. (You might need the Invert Selection command, too!)
You can also resize screenshots, and even do some tweaks to the colours with the Adjust Color pop-up. Select Adjust Color… from the Tools menu, and you get some handy sliders and a histogram to help you tweak things. Plus, hit the backtick symbol (to the left of Z on a UK Mac keyboard, and to the left of 1 on a US Mac keyboard) to bring up a loupe so you can see what’s happening at 100% as you make changes.
4. Annotate screenshots using Preview
As well as letting you crop, resize and tweak screenshots, Preview has some nifty built-in annotation features that come in useful for placing instructional (or other) text over them. Make sure the Edit Toolbar is visible (from the View menu) and you’ll see options for drawing shapes, speech, thought bubbles and more.
For creating instructions out of screenshots, the arrow tool will come in particularly useful. There’s also the option to highlight text in different colours, strikethrough some text, add notes and type some text into boxes.
5. Share screenshots quickly
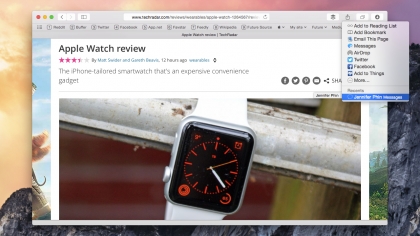
Keeping screenshots to yourself is no fun (unless they’re receipts, and then you probably should), so it’s a good job Yosemite makes sharing them a breeze. Placed at the top-right hand corner of windows is a share button that, when clicked, displays how and whom you most often share files with. So once you’ve shared a screenshot, you’ll see their name(s) at the bottom of the share menu, making them easy to pick out next time.
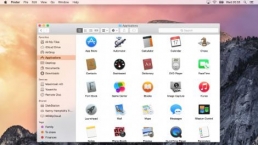
6. Open screenshots in another app
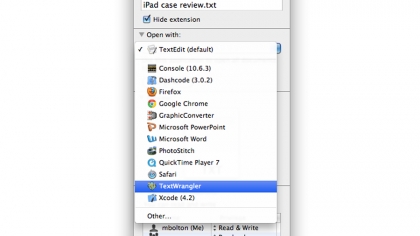
If you’re not too keen on editing your screenshots in Preview, you can save yourself a bunch of time by setting image files to open in another image-editing app (such as GIMP) by default. To do this, select the screenshot file and press Command+I to show its information. Where it says ‘Open with:, use the drop-down menu to choose a new app. At this point, if you close the window, that change will only be applied to that one file; if you want other files of that type to use that same app, click ‘Change All…’ beneath the drop-down menu.
7. Add a signature to your screenshot
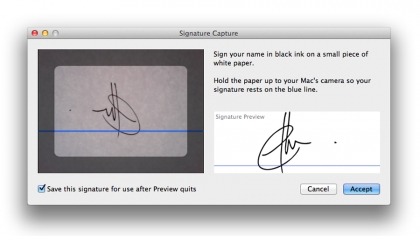
In OS X 10.7, Preview gained the ability to add your signature to documents, which can be handy if you’ve taken a screenshot of a form and need to write yours on a dotted line.
To get started, go to the Signatures tab in Preview’s preferences and then click the +. Now, sign your name in black ink on a small piece of white paper and hold it up to your Mac’s webcam. Line it up and click Accept (making sure the ‘Save this signature’ option is checked if you want to use it in the future).
Now open a document you want to sign, pop up the Edit Toolbar and click the signature icon – it looks like an S on a line next to a tiny x. Draw a box to add your signature on the form. You can scale and reposition it afterwards too.
8. Send screenshots to your iPhone
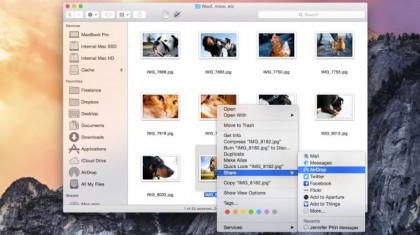
If you want to take your screenshots with you but you’re in a hurry, the fastest way to send them to your mobile device is to use Bluetooth 4 (you’ll need a fairly modern Mac) and a recent iOS device (iPhone 5 or later, for example). It’s done by right-clicking on the screenshot file and selecting AirDrop from the Messages fly-out menu, before tapping on the device you want to send it to. A note: you’ll need AirDrop turned on from the Control Centre of the iOS device first.)
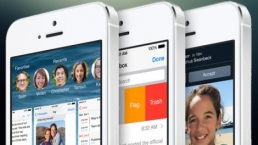
9. Quickly take iPad/iPhone screenshots
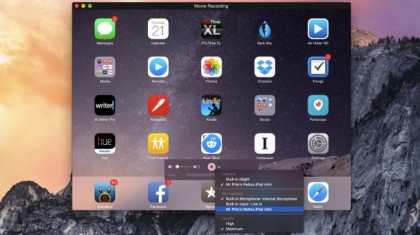
With Yosemite, you can now record whatever happens on the screen of your iPhone, iPad or iPod touch, which gives you a sneaky way to take many screenshots quickly – quicker than pushing your device’s Home and Power button at the same time, anyway.
To use this feature, you just connect your iOS device up to your Mac using its cable, then launch QuickTime Player. Next, choose New Movie Recording from the File menu and then, if it’s not already selected for you, choose your connected iOS device as the ‘camera’ source from the drop-down menu next to the record button.
You’ll now be able to see what’s on your device’s display, and use OS X’s keyboard shortcuts to save screenshots to your desktop to then be shared using AirDrop or store them in iCloud (check out the next slide).
10. Store screenshots in iCloud
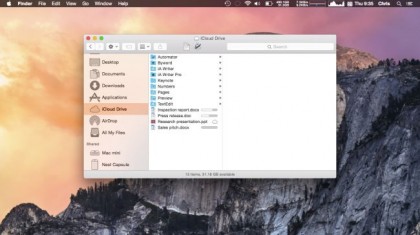
It used to be the case that the only files you could store on iCloud were from specially-built apps such as Apple’s iWork suite, but now we have iCloud Drive in Yosemite, we can chuck any files we like onto the iCloud Drive icon in the Finder sidebar.
Those special, blessed apps still get their own folders, but you can create your own or just put things loose into iCloud Drive – including screenshots. All those files will sync to other Macs signed in with your Apple ID (so long as you’ve enabled iCloud Drive on them) and will also be available through icloud.com. On iOS, apps that can use iCloud will usually default to opening files from their special folder, but should also allow you to browse through your entire iCloud Drive to open files stored elsewhere.
11. Batch rename screenshots
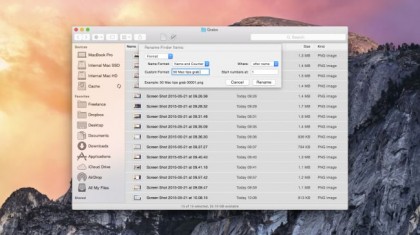
In versions before Yosemite, renaming a group of files at once either meant third-party software or rolling your own rename script using something like Automator or AppleScript. Now, though, you can just select a group of screenshots and then select Rename either from the right-click contextual menu or from the drop-down button marked with a cog icon in Finder windows. When you do, you get the option of adding text, replacing text, or applying a format such as a name and an automatically incrementing counter.
![]()
Related Posts

Apple to Pay $250 Million Settlement Over Misleading iPhone AI Siri Features
Apple has agreed to a $250 million…

OpenAI in Court: Greg Brockman, Elon Musk, and the Battle Over AI’s Future
OpenAI’s president Greg Brockman takes…

Reggie Fils-Aimé Reveals Why Nintendo Stopped Selling on Amazon in the DS Era
Former Nintendo of America President…

Musk v. Altman: Revealing the Early Secrets of OpenAI
Get an inside look at the Musk v.…

Apple’s “Ultra” Era: The Next Evolution for iPhone and Mac
Apple is rumored to expand its ‘Ultra’…

How AI Is Changing Breakups: A Look at Digital Relationship Endings in 2026
Breaking up is never easy, but in 2026,…

Elon Musk’s Courtroom Performance Raises Eyebrows in Musk v. Altman Trial
Elon Musk appeared less prepared and…

Jury Selection in Musk v. Altman: Public Opinion Challenges Elon Musk in Court
Jury selection in the high-profile Musk…
Google’s New Gradient Icons: A Fresh Look Coming to More Apps
Google is expanding its new gradient…

GPT-5.5: OpenAI’s Latest Breakthrough Is Resetting the AI Bar
OpenAI’s GPT-5.5 has arrived, setting a…

Xbox Game Pass ‘Starter Edition’ Leak: New Bundle with Discord Nitro Revealed
A new leak reveals Microsoft is…

DJI Launches Lito Series: Affordable Entry-Level Drones Starting Under $400
DJI introduces the Lito 1 and Lito X1,…

The End of Human Intimacy: How AI Companions Are Rewiring Our Emotional Lives
Are AI companions truly filling the…


The new brand identity
When you are alone for days or weeks at…