
Introduction
For the better part of a decade, iPhoto was arguably the cornerstone of Apple’s successful suite of consumer creative iLife products. Many of us got in the habit of shooting our daily and family adventures, then manually syncing them to our Macs when we have a free moment.
But times change. We now live in an age of ubiquitous cameras, always-available cloud photo libraries, and one-touch editing. With the meteoric success of iOS, Apple has elected to retire both iPhoto and “iPhoto Pro” (a.k.a., Aperture). It’s no secret that iPhoto was getting bulky and slow, and the pro-centric Aperture has been eclipsed by its largest competitor, Adobe Lightroom. Both products have already been “sunset” and will receive no updates going forward.
A successor now rises in their place that is both familiar and different — an all-new Mac edition of the Photos for iOS app, which over 700 million people (and counting) are quite familiar with.
Over the following pages, we’ll explain how the new Photos works and give you helpful tips.
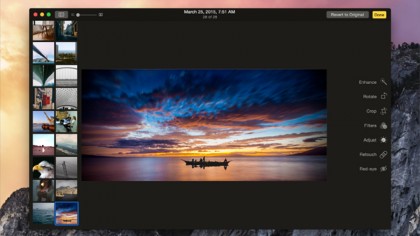
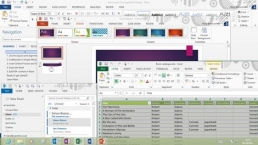
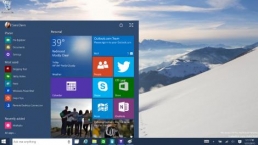
Quick look: the main Photos area
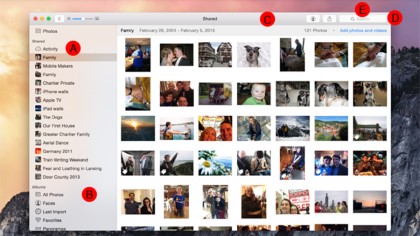
This should feel pretty familiar, whether you have previously used iPhoto or just about any similar app or service. It’s all your photos (and videos), displayed in a simple grid. If you’re using a Trackpad, you can pinch in and out to quickly resize the grid and see larger photos with more detail or more photos all at once.
A. Sidebar: Here is where you can slice and dice your library. In fairly standard Apple practice, new Albums, Smart Albums, and Folders you create are listed here. This also displays any Shared Photo Stream albums you have created or joined.
B. Smart Sidebar: Photos for Mac does quite a bit of library organization for you, automatically sorting some items into sections like Faces (Mac-only for now), Favorites, Panoramas, Videos, Slow-Mo, and more. Unlike albums you create, you cannot remove any of these sections.
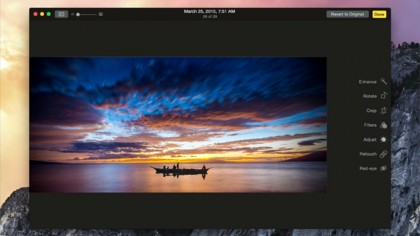
C. Toolbar: An app’s toolbar is often your anchor, your home base for figuring out where you are and what you can do next. For iPhoto and Aperture users, the Photos for Mac toolbar is dramatically simplified. Only a couple options are visible while browsing photos and albums, and options to share and edit a photo appear only once you select or double-click, respectively.
D. Editing: Click the Edit button at the right of the toolbar to craft a photo into your own image. A suite of tools, which iOS users should recognize, appears to the right of your photo as the app switches into an editing interface. This is where the magic happens.
E. Search: What good are ever-expanding photo libraries without a way to search through them? Here you can zero in on just about anything, including metadata like locations and dates that is automatically captured when you shoot with an iPhone, as well as album names, Faces, and other information you add.
Organizing your photos

By default, and just like iOS, Photos for Mac punctuates your photos and videos using basic metadata of time and location (when available). Combine this with the new built-in sidebar categories, and many people will be happy with this level of automated organization.
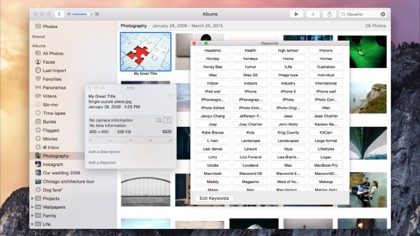
For the more adventurous, you can create albums to organize media for just about any purpose or topic you want. If that isn’t enough, you can also use Smart Albums, a longtime staple of iPhoto, Aperture, and OS X itself, to automatically filter your library by criteria such as date, text in titles you add, and even the camera used.
Of course, the fabric tying all Apple products together is iCloud, and it is a first-class citizen here with a custom feature name: iCloud Photo Library. If you enable this, your entire library will automatically sync between all devices as long as they’re on Wi-Fi. Yes, even edits you make to photos will sync, as will your ability to revert a photo to its original form.
If I have a complaint with the organizational features of Photos, it’s that not all of them sync with iOS. You can create Smart Albums and organize Faces on Mac, but as of this writing, Apple’s latest iOS doesn’t see them. Our ever-expanding photo libraries sync to all devices now, but the smart tools we need sift through them do not. Also, out-of-the-box, Photos is woefully short on filters. I hope Apple allows third-party apps to add filter tools on Mac like they can on iOS.
Step-by-step: get organized
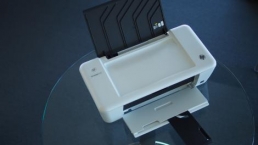
1. Import Your Photos: Of course, you need to get your photos into Photos for Mac to do anything with them. If, like most people, you shoot everything with your iPhone, be sure to enable iCloud Photo library on all your devices for effortless sync. To manually import from a traditional camera, simply plug it in via USB to trigger the Photos for Mac import tool.
2. Create an Album: Use File > New Album to create a blank album in your sidebar, give it a name, and start dragging photos into it. Alternatively, if you hold Command or Shift to select multiple photos, then click File > New Album, all selected items will be automatically organized into that new album.
3. Get Smart: If you really want to start organizing, use File > New Smart Album to create a live, dynamic filter of your library. For example, you could combine criteria like “date” and “Face” to find all photos of yourself from that one time in your life and delete them to leave no evidence… or simply reminisce.
4. New Shared Album: A great feature of Apple’s new photo ecosystem is the option to share and even collaborate on an album with friends and family. Use File > Share > iCloud Photo Sharing to share media with people you invite (Apple devices required). You can even let others upload, making these handy for collaboration.

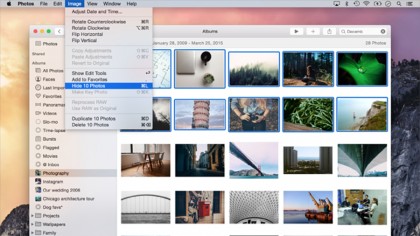
6. Hide Photos: If you save images like Internet memes or screenshots on your iPhone, but don’t want them cluttering your actual photography, Photos for Mac (and iOS) can hide them (Image > Hide Photo). If you put them in albums first, the photo will display in that album, but not in All Photos.
Basic photo editing
Photos for Mac provides a nice, succinct set of editing tools to help most typical users polish their memories. iOS users should feel right at home with the handful of options — Enhance, Rotate, Crop, Filters, Adjust, Retouch, and Red-eye — but iPhoto and Aperture users shouldn’t have any trouble picking them up.
Like iPhoto, Aperture, and Photos for iOS, edits are non-destructive (you can undo them tomorrow or a year from now), and they even sync across devices if you use iCloud Photo Library. Crop a photo in Photos for Mac and add a filter for that extra style, and later you can revert back to the original from your iPhone or iPad. Yep, we live in the future.
As I mentioned earlier, the Edit button won’t appear in the upper-right until it’s needed (the idea is that users don’t need to see certain tools until they are in the right mode or it is necessary). But once you’re editing, the entire interface shifts to accommodate. The sidebar automatically hides, the light, Yosemite-standard background turns to black, and the edit tools appear on the right; it’s pretty difficult to miss that you have left “organization mode” and are now in a different task.
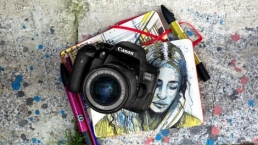
Let’s give some basic edits a try with a photo from Unsplash.com, a great photography project that regularly publishes beautiful photos which are free to use for anything you want.
Step-by-step: edit your photos
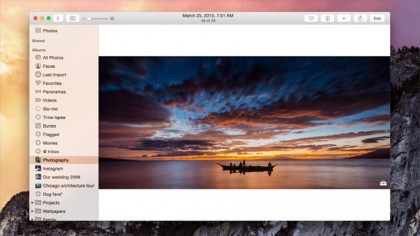
1. Time to Edit: To enter edit mode, find a photo in your library or download one from Unsplash.com (http://unsplash.com/) and drag it in (remember, all edits are non-destructive, so feel free to play around now and backtrack later). Double-click the photo to view it individually, then click Edit at the right of the toolbar.
2. One-Click Fix: If your photo needs a quick boost, use the first tool, Enhance. It has no options or customization, but will assess your photo for things like white balance and color balance, then automatically tune it for sharing or posterity.
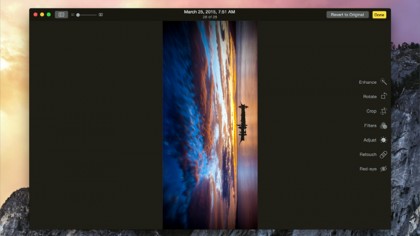
3. Right-Side Up: Sometimes a photo falls on its side, or your iPhone’s rotation lock might have caused it to appear upside down. Use the Rotate tool to make it right. Bonus sub-tip: hold the Option key to switch the rotation direction.
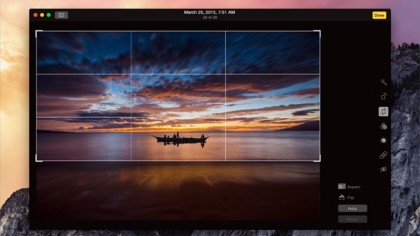
4. Crop for Focus: Editing tools should appear on the right. Let’s focus on a good part of the photo by clicking the Crop tool. Now click and drag the handles that appeared around your photo to move the most prominent person or object to the center, or perhaps near the lower left or right corner.
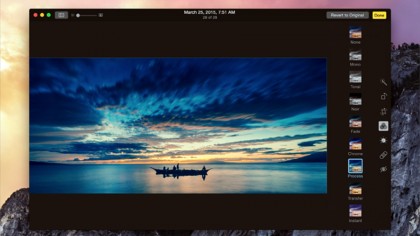
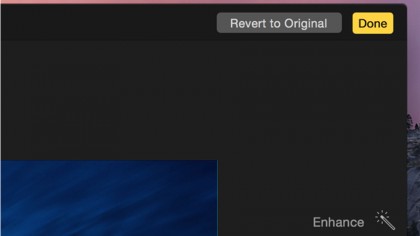
5. Add Some Style: Move back over to the toolset on the right and click Filters. Apple includes a handful, so you could try “Process” to add a dreamy state, or “Noir” for some mystery. When you’re happy, click Done in the upper right to keep your new masterpiece.
6. Throw It All Away: But what if you didn’t just create a masterpiece, and maybe even ruined a priceless family memory? No problem! Double-click the photo again to view it individually, then click the Edit button. See “Revert to Original” right next to Done? There’s your ticket back to square one.
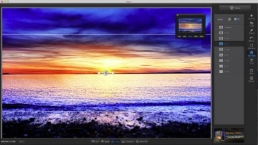
Advanced editing tools

Despite its focus on the everyday customer with Photos for Mac, Apple packed in a number of advanced photo-editing tools that are easy to access if you want them, yet effortlessly avoidable if they just aren’t for you. They surely aren’t an end-all replacement for serious Aperture users or professionals, but they may be just what you need when it’s time to move beyond a crop and a filter.
In true Apple fashion, diving into the advanced editing tools feels deceptively simple. These tools live alongside the others we just tinkered with, at times adding an advanced feature to a core tool (like fine-grained rotate/leveling in Crop), and sometimes being collected in their own section like Adjust.
As you might expect, these tools can all stack or combine their effects as you work (and yes, everything is still non-destructive if you have to start over, whether you decide right now or a year down the road). For example, if a photo’s colors are all over the map, you can first crop it, then use a White Balance adjustment on the cropped area to better center its palette, then use a filter to add style, again on just the cropped portion.
Let’s roll up our sleeves and dig a little deeper.
Step-by-step: Advanced editing
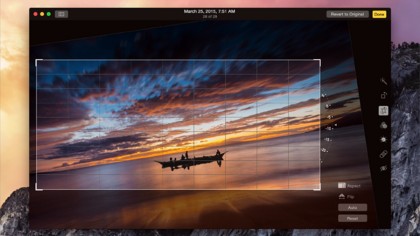
1. Rotate to a Degree: You may have noticed that a degree meter appeared with the Crop tool, just to the right of your photo. Click and drag this to level your photo with fine control; this is great if you were off-balance when shooting or if you want to add some tension to a shot.
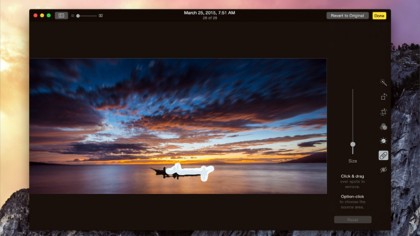
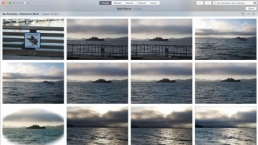
2. Retouch: Arguably one of the most “magical” tools, Retouch is a surprisingly accurate way to make many unwanted elements disappear. This is great for restoring aged, cracked family photos to glory or even, in this example, removing the boat and its passengers from view.
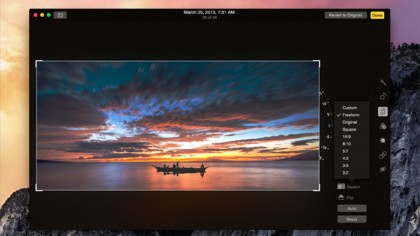
3. Crop to a Standard: If you are often cropping photos for a specific use or format — say, 5 x 7 inches for print or 16:9 for featured blog post images — look to the bottom of the Crop tool. Click the Aspect button for a bunch of size presets, or define your own dimensions.
4. Split View: If you’re on an editing roll, use View > Show Split View to show a left sidebar of all photos in the currently selected album. This gives you a bird’s-eye view of the other photos you can edit, and it’s just one click to switch while staying in edit mode.
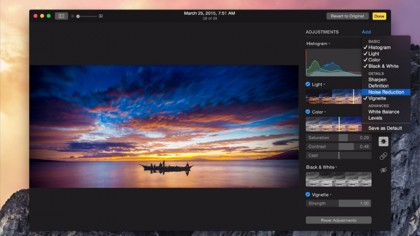
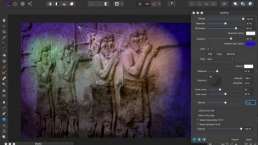
5. Adjust: This is where you can take complete, manual control over enhancing your photos. Sliders offer fine-grained control over everything from color saturation to highlights and shallows, complete with clever thumbnail previews before you start sliding.
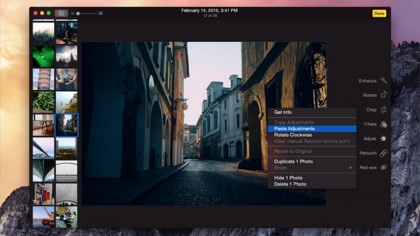
6. Paste Adjustments: When editing a similar group of photos and you get adjustments on one just the way you like, you can copy and paste it to all the others. Simply use Image > Copy Adjustments on the current photo, then Image > Paste Adjustments on the rest.
7. Adjust Your Adjustments: You can add a broad array of tools to the default set. Click the Add button at the top of the Adjustments column — everything from a histogram, to noise reduction (for grainy photos), and even a Photoshop-ish levels panel can give you great control over your photos.

8. Levels: Long hailed as one of the most useful photo-editing tools, a Levels tool is like going under the hood of the Light and Color adjustments. Levels allows you to adjust color and tone by hand, and to fix “flat” images by setting new black and white points.
![]()
Related Posts

Apple to Pay $250 Million Settlement Over Misleading iPhone AI Siri Features
Apple has agreed to a $250 million…

OpenAI in Court: Greg Brockman, Elon Musk, and the Battle Over AI’s Future
OpenAI’s president Greg Brockman takes…

Reggie Fils-Aimé Reveals Why Nintendo Stopped Selling on Amazon in the DS Era
Former Nintendo of America President…

Musk v. Altman: Revealing the Early Secrets of OpenAI
Get an inside look at the Musk v.…

Apple’s “Ultra” Era: The Next Evolution for iPhone and Mac
Apple is rumored to expand its ‘Ultra’…

How AI Is Changing Breakups: A Look at Digital Relationship Endings in 2026
Breaking up is never easy, but in 2026,…

Elon Musk’s Courtroom Performance Raises Eyebrows in Musk v. Altman Trial
Elon Musk appeared less prepared and…

Jury Selection in Musk v. Altman: Public Opinion Challenges Elon Musk in Court
Jury selection in the high-profile Musk…
Google’s New Gradient Icons: A Fresh Look Coming to More Apps
Google is expanding its new gradient…

GPT-5.5: OpenAI’s Latest Breakthrough Is Resetting the AI Bar
OpenAI’s GPT-5.5 has arrived, setting a…

Xbox Game Pass ‘Starter Edition’ Leak: New Bundle with Discord Nitro Revealed
A new leak reveals Microsoft is…

DJI Launches Lito Series: Affordable Entry-Level Drones Starting Under $400
DJI introduces the Lito 1 and Lito X1,…

The End of Human Intimacy: How AI Companions Are Rewiring Our Emotional Lives
Are AI companions truly filling the…


The new brand identity
When you are alone for days or weeks at…